
Business Central - Field Monitoring Setup
In Microsoft Business Central, Field Monitoring is a feature and functionality that adds a layer of security and monitor changes to a particular field record within a table. With the Field Monitoring configured, an administrator can also set up an email notification, notifying that a sensitive field record has been changed. The email notification also contains the old value and the new value it was changed to and by whom.
Before we start, I would suggest that you configure and set up email within Business Central.
Why is it important to utilize Field Monitoring? Well, for one, you don’t have to scroll through countless lines of Change Logs. Second, you can focus on a much more targeted field to monitor, rather than the entire table, all done with Business Central.
To set up, navigate and search Assisted Setup and click on Set up field monitoring. Go through the setup process.

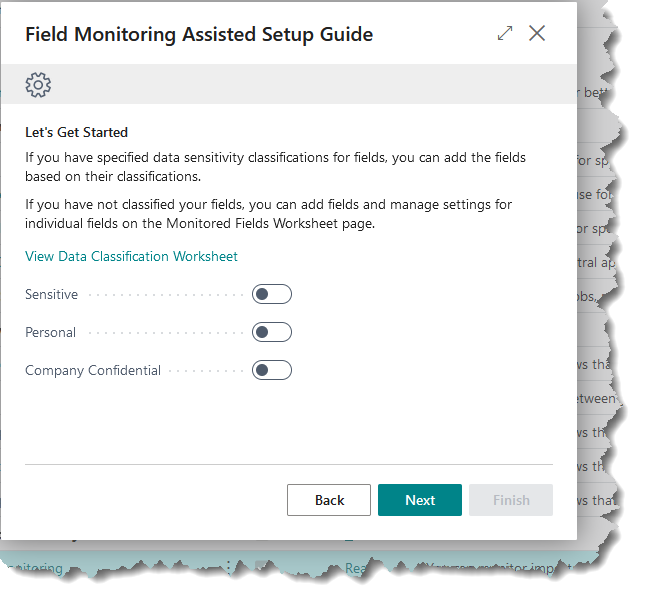
During the setup, keep in mind of which data sensitivity you want to enable and there are three (3) options that is presented. You can enable all or just specfic.
Sensitive: Information about a data subject’s racial or ethnic origin, political opinions, religious beliefs, involvement with trade unions, physical or mental health, sexuality, or details about criminal offenses. This is useful for fields within the employee or contact card.
Personal: Information that can be used to identify a data subject, either directly or in combination with other data or information.
Confidential: Business data that you use for accounting or other business purposes, and do not want to expose to other entities. For example, this might include ledger entries.
Normal: General data that does not belong to any other categories.
With this example, I’m going to enable all of the classifications.
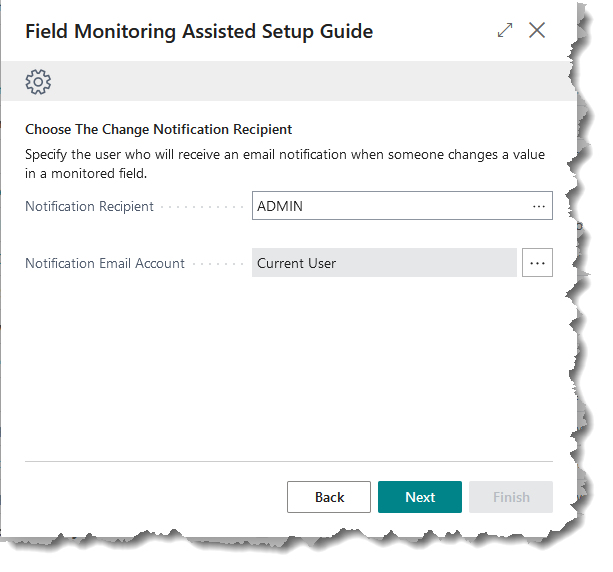
As you move to the next step, you’ll be prompted of who should be notified if the data is changed against fields that are classified accordingly. We will cover how to enable a specific field to be notified shortly.
Once you choose the correct recipient, click Next and Finish. Leave the “View Monitored Fields” enabled.
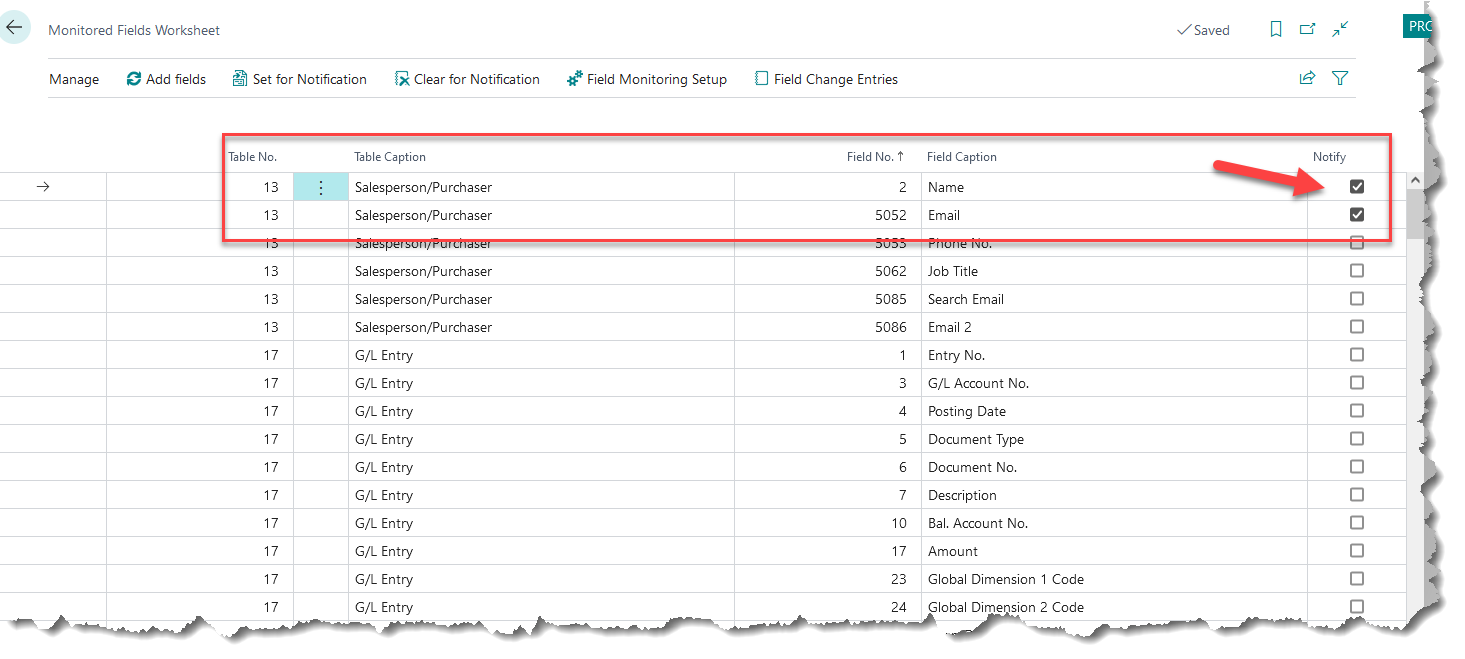
As you finish the assisted setup, it will then navigate you automatically to the Monitored Fields Worksheet. You’ll notice that there are already records populated for you to start. From the worksheet, there is an important column, Notify. This is what triggers the Field Monitoring tool to send a notification to the recipient that you configured if any changes are made against said field.
For the sake of this example, I am going to enable two fields within the Salespeople/Purchaser table where if the Name and Email were changed, it is to notify the recipient that something was changed to those records.
To test this scenario, I navigated to the salespeople/purchaser page and made a change to one of the record. Once the record was change, Business Central immediately captured the change against those fields. To confirm, you can navigate and search for “Monitored Field Log Entries” or from the Monitored Fields Worksheet, click the “Field Change Entries” button.
You should see the changes that occurred against the record. As you can see, I changed the Name and Email against that record. Letting you know the Original and New Value. Please note, under the Notification status, it states which of the row record had notification turned off where the two fields I enabled Notify, attempted to send while the other fields are Turned off. Troubleshoot notification status when necessary.

Microsoft Reference: https://docs.microsoft.com/en-us/dynamics365/business-central/across-log-changes