
Business Central and Power Automate with Adaptive Card and Teams
Microsoft Dynamics 365 Business Central is a powerful ERP system that enables organizations to streamline their business processes. One of the key features of Business Central is its seamless integration with Microsoft Power Automate, a versatile automation platform that helps businesses automate repetitive tasks and improve efficiency.
In this blog post, we'll explore how you can use Power Automate to create a notification system for new customer records created within Business Central. This automated process can help your team stay informed and responsive to new business opportunities. Power Automate will also interact with other Microsoft communication tools like Teams and Outlook.
Power Automate is a cloud-based service that enables users to create automated workflows between various applications and services. With its extensive library of connectors, Power Automate can be used to integrate Business Central with other Microsoft tools and third-party applications. This integration unlocks the potential for more efficient and streamlined business processes, including a simple notification beyond Business Central’s eco-system.
To show how powerful Power Automate is, we’re going to use a common scenario: New Customer notification. I am looking to notify my onboarding team of the new customer. What if you want to notify others via other communication tools, beyond the confines of Business Central application? Power Automate is here to shine.
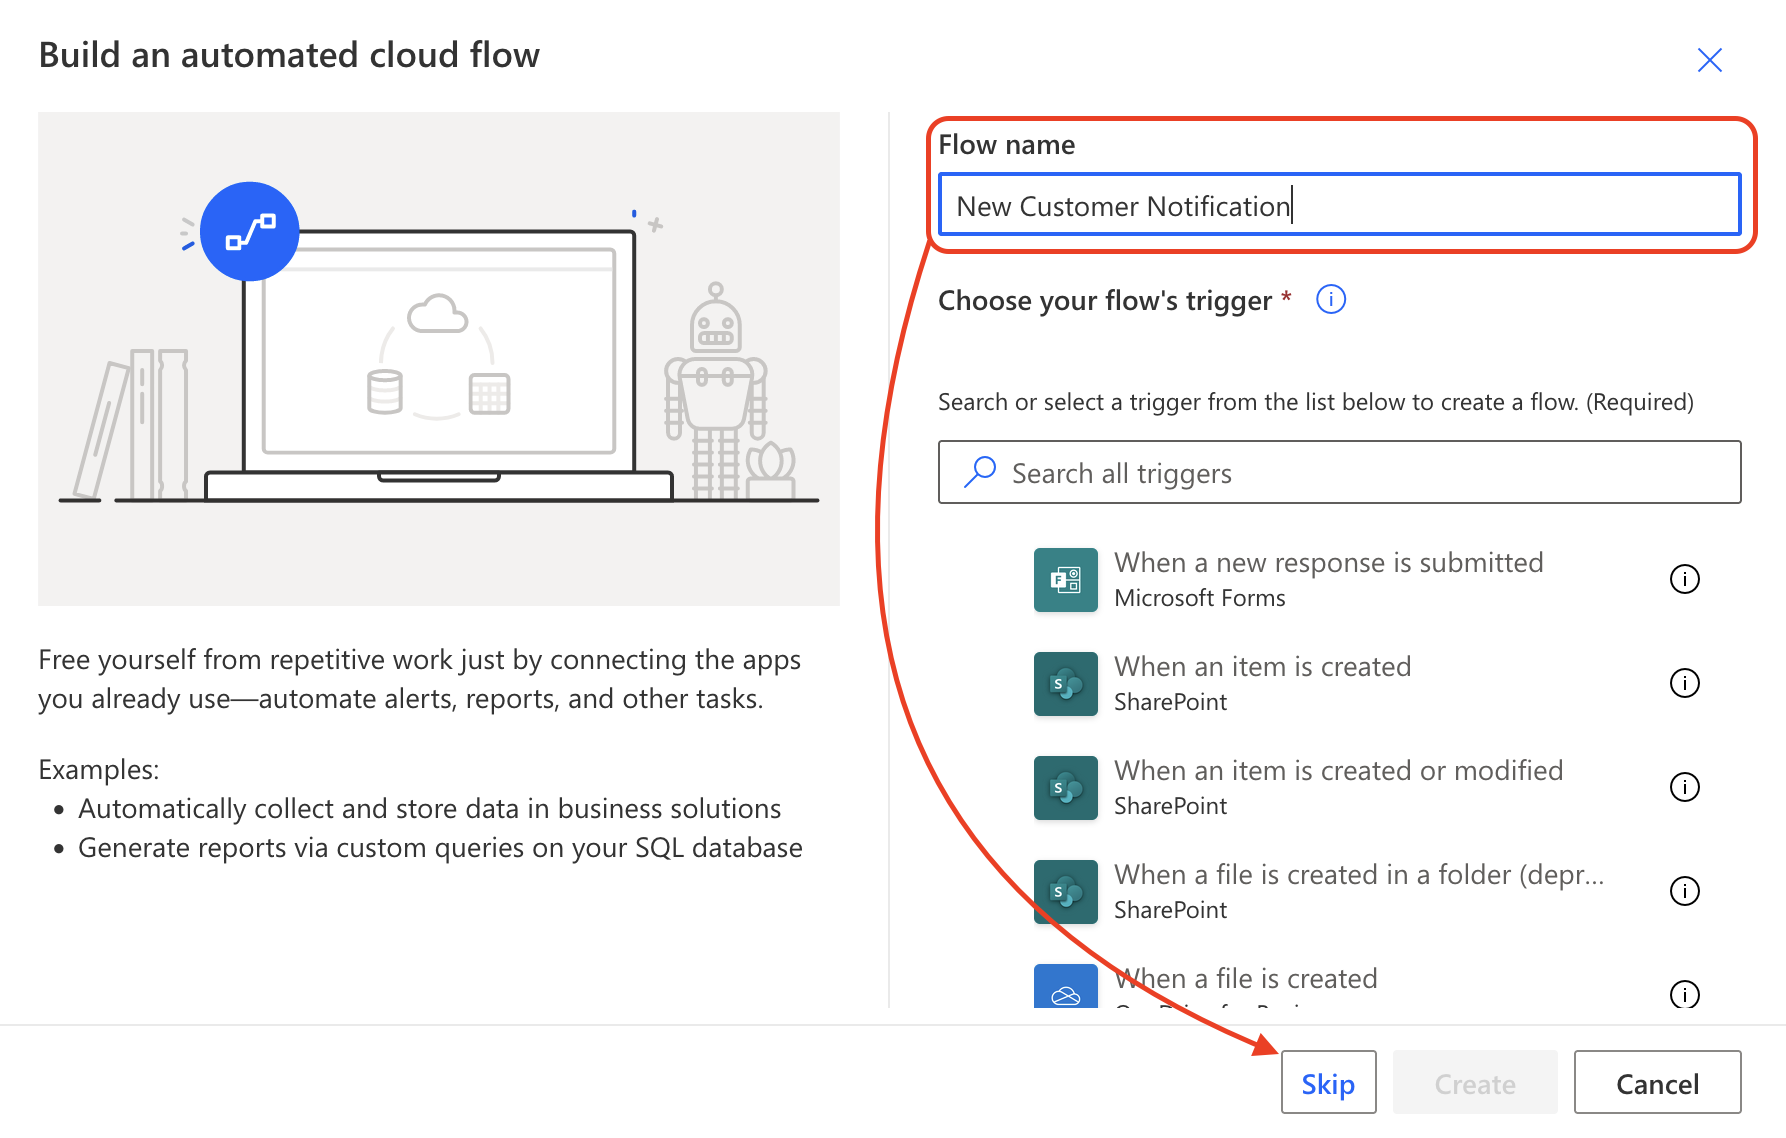
First step is to ensure you have access to Power Automate then navigate to https://make.powerautomate.com and click on Create and Automated cloud flow because I want to automate this every time a new customer is created.

Microsoft: Power Automate
Give it a flow name that matches to the purpose of the Power Automate flow. In this example, I’m going to give it a name of: “New Customer Notification”. Yes, I’m very original. Then click “Skip”. You can set the flow’s trigger from the menu below, but I want to show you how you would build it from scratch.
Microsoft: Power Automate
The next step is for your to search for Business Central connector and choose the “When a record is created (V3)”. Then populate the required fields on the right environment, company, and table. The API category should be v2.0.

Microsoft: Power Automate Business Central Connector

Microsoft: Power Automate Business Central connector
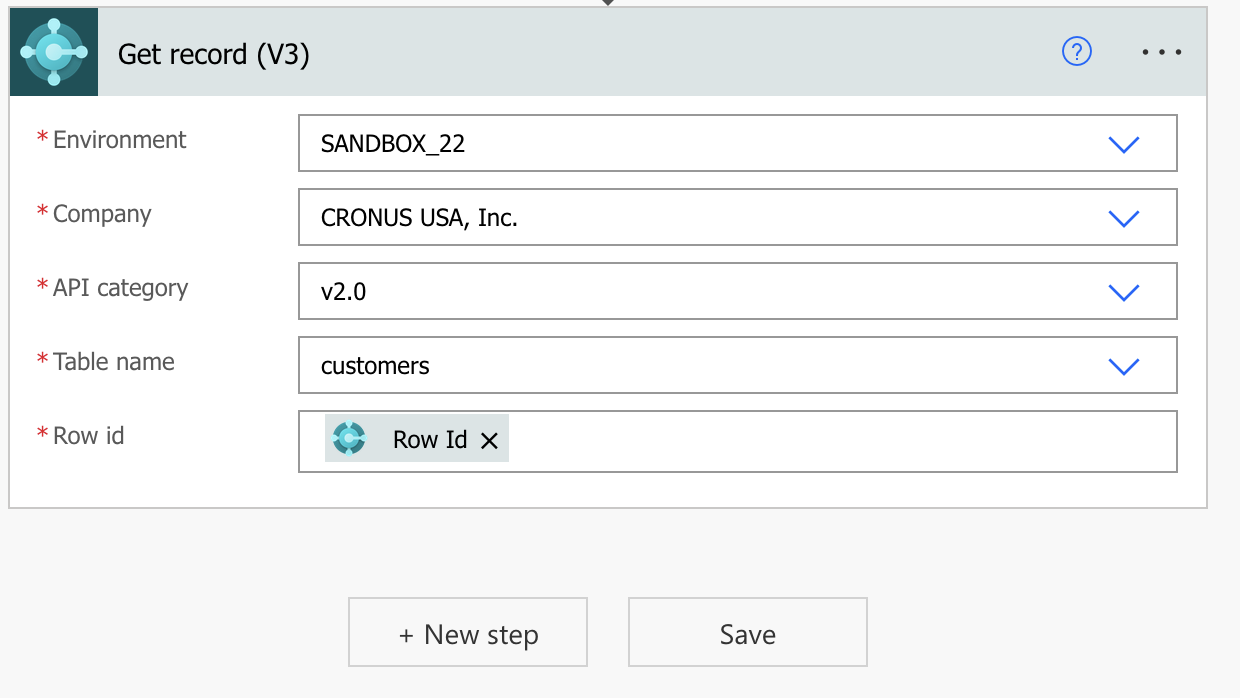
Now that you have the trigger of when a record is created from the customer table, you will need to get the record. Add another step, search for Business Central connector and choose the “Get Record (V3)”. The reason you need this is you will need this particular record that was created to create a URL to post on Teams as an adaptive card.
So with that, you will need to add another New step: Get url (V3).
Microsoft: Power Automate Business Central connector
Populate all the fields and note, the Page field may NOT provide you the pageId option, so that means you will just need to type the page object id, in this case, it is Page 21. For Row id, it should be the Id for the record.
Note: If you don’t know the page id, you can get it from Business Central’s Inspect Pages and Data under Help & Support menu.

Microsoft: Power Automate Business Central connector
Now that we have the url for the particular record, we will need to convert that into an adaptive card. One cool thing about the Business Central connector, it has an action for Get adaptive card (V3).
Since the prior step allowed us to get the url for the record, you can just reference it from the “Get url (V3)”.

Microsoft: Power Automate - Get adaptive card (V3)
Now that we have the adaptive card set, we are now ready to post the notification within Teams! So let’s add one more step and search for the Teams connector and populate the required fields and the channel or person you want to send the notification to.
Just like the previous step, you can reference the “Adaptive Card” to the prior step.

Microsoft: Power Automate - Post card in a chat for channel
With this example, I am all set and ready to test! Please note that you can expand beyond just what I shared on this post. You can even add “Outlook” connector as well if you prefer to send an email. Now let’s go ahead and test this and see the result.
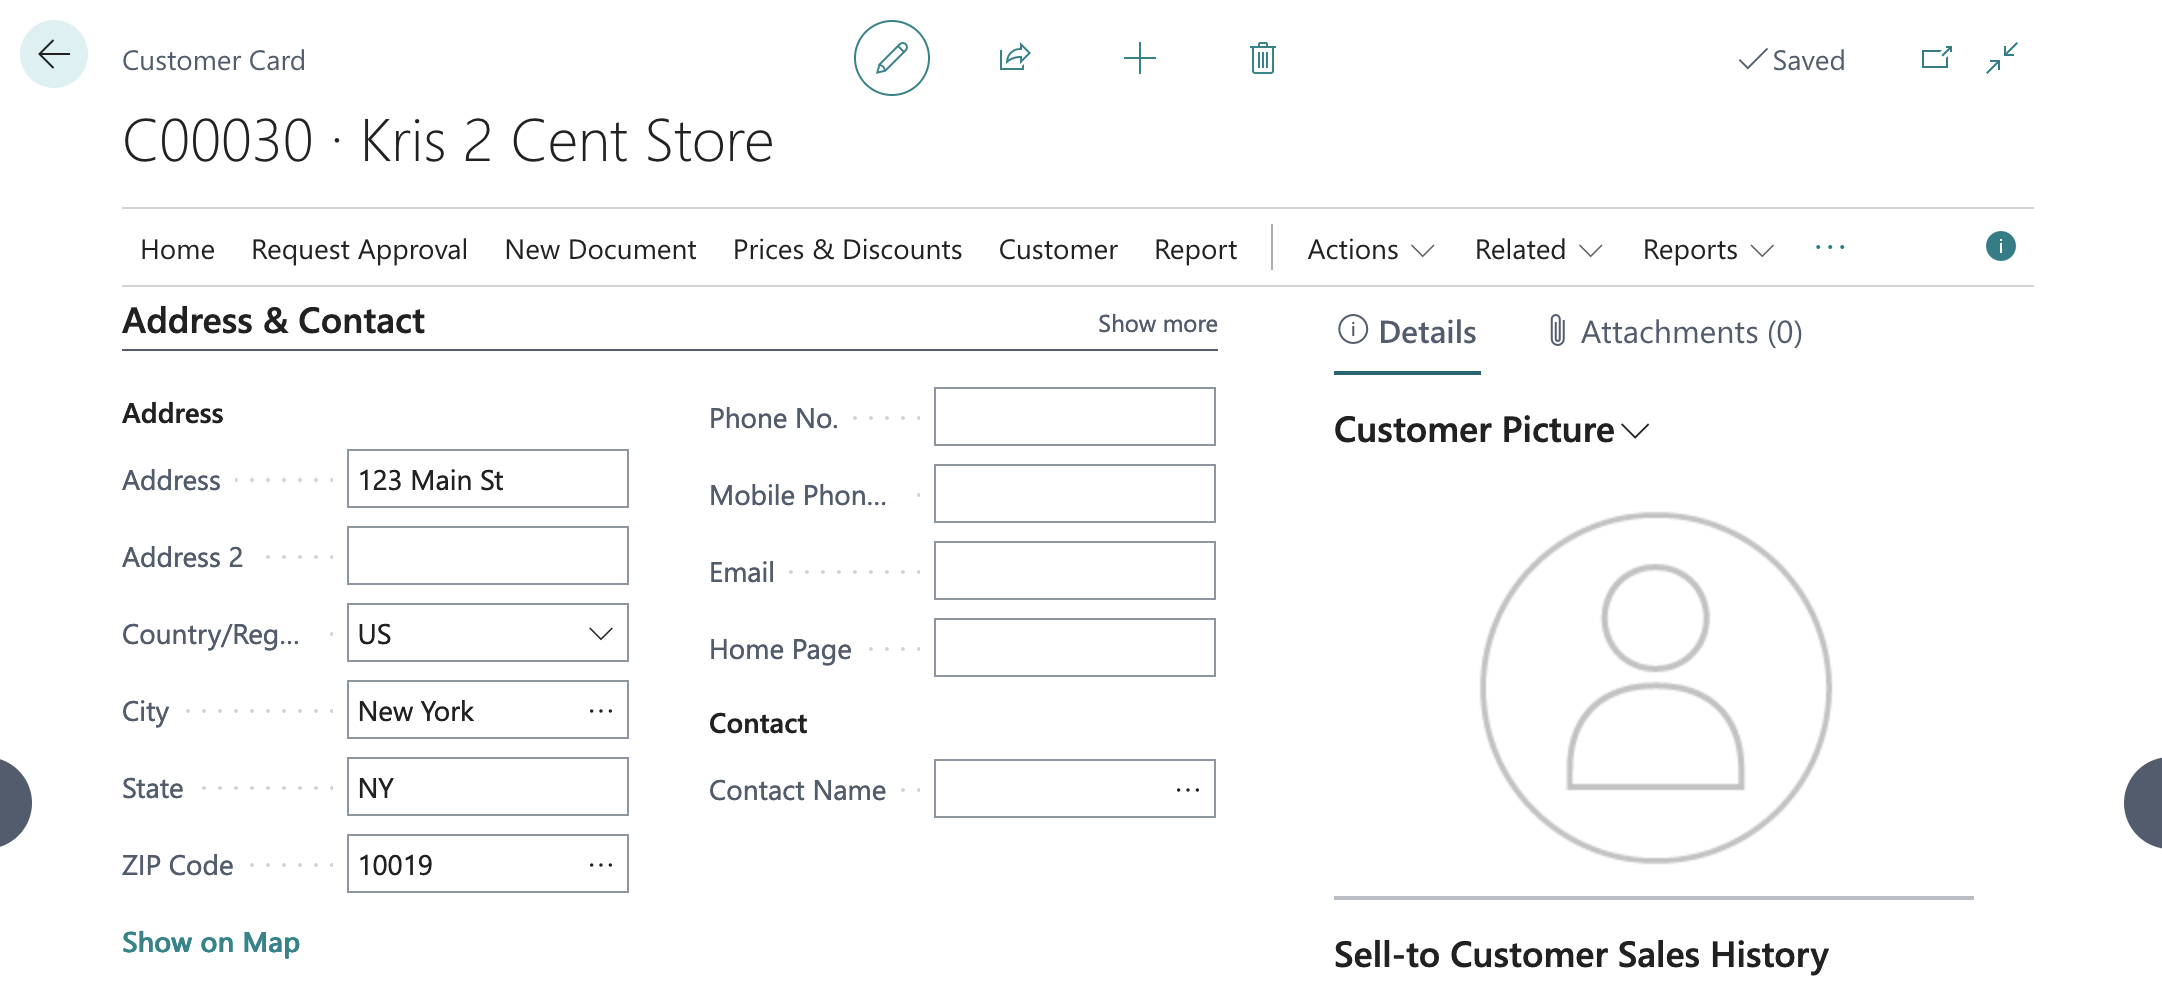
I created a new customer within Business Central and very shortly after, it posted into the Teams channel as an adaptive card. You can even click on the details from the adaptive card and it’ll open up the record within Teams, minimizing app switching.
I hope you find this post helpful and realize the flexibility of Power Automate! Until next time!
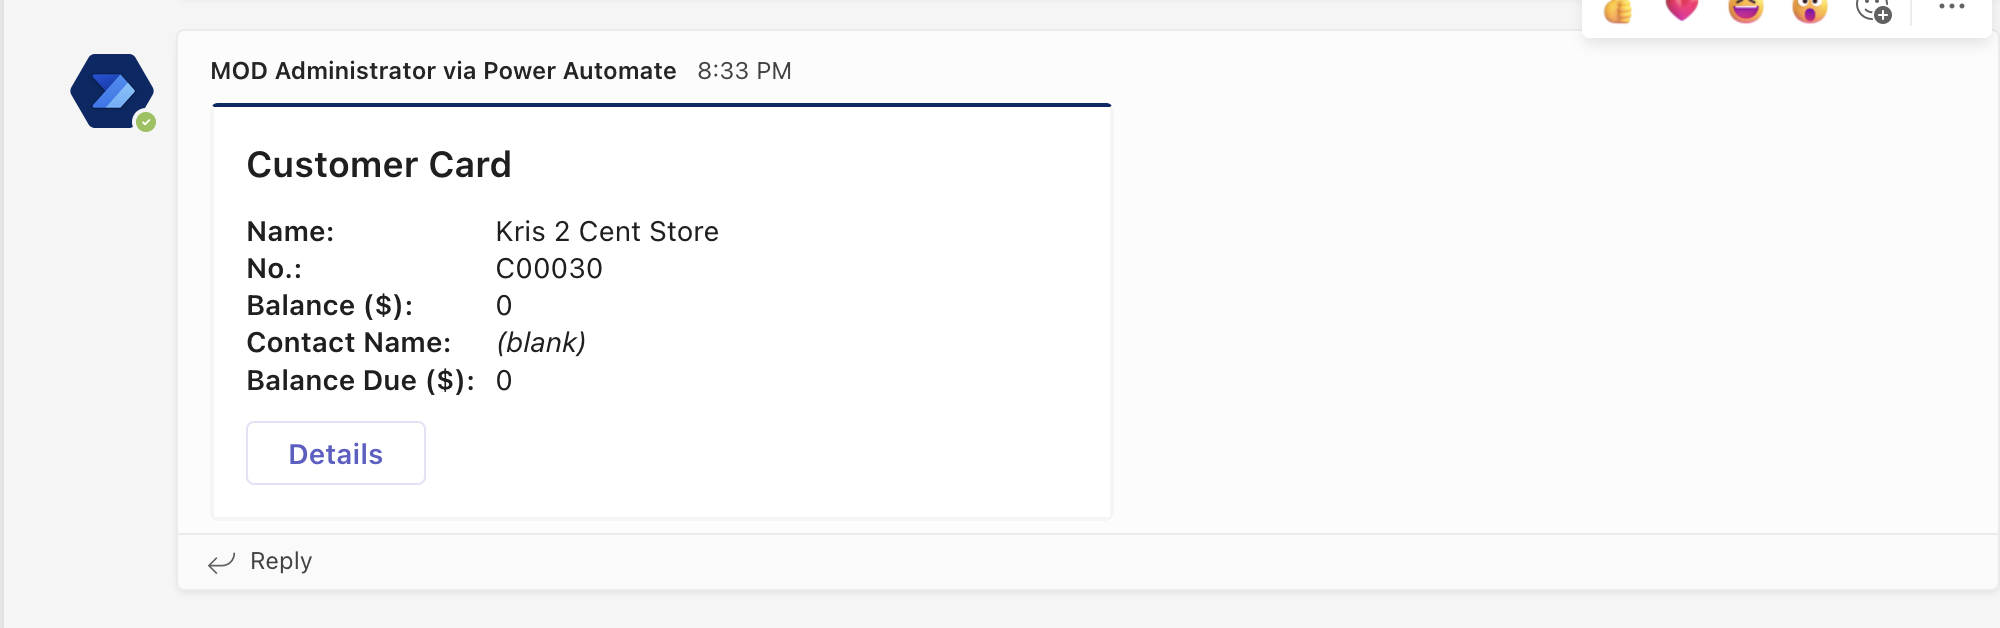
Microsoft: Teams adaptive card