
Modifying the body of an email in Business Central
I came across a recent post and discussion on how to modify or update the body of an email within Business Central so I wanted to write a quick blog post about how easy it is to do so.
I’m going to take one of the most common scenarios, emailing Sales Order confirmation. Let’s start by reviewing what you may have out of the box by navigating to a Sales Order, click Print/Send and Email Confirmation. From this example, you will see there are default components already out of the box.
From the second screenshot, you can edit directly from the page, however, you may want to format the email body to always look the same or even add a Logo or other verbiage.

Business Central: Email Confirmation

Business Central: Email Confirmation
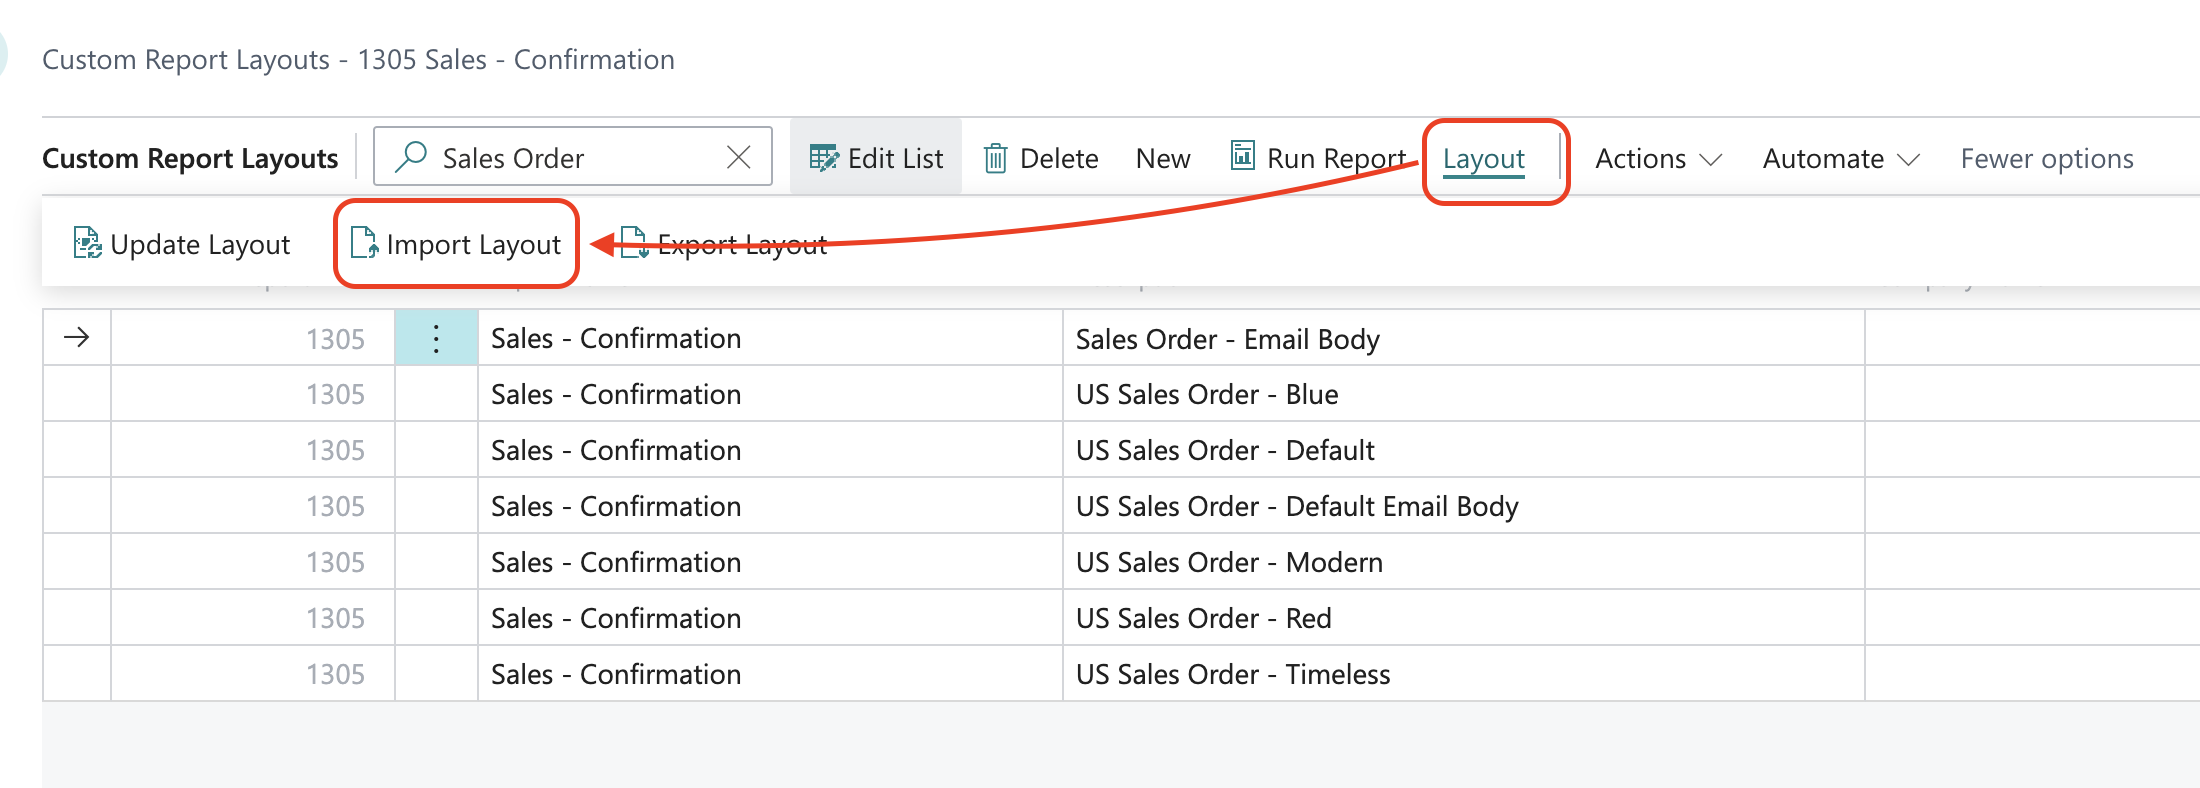
Let’s consider that you need to modify or add some wording. The easy way to approach this is to review what you already have available and build upon that. So, let’s navigate to Custom Report Layout page and search for Sales Order.
Note: You will see other custom report layout, you will need the one with the description of “US Sales Order - Default Email Body”.
Next step is to create a copy of an existing layout. The reason for this so that you have a default to go back to. Click New and Copy. When you do, you will notice a new custom report layout, I would suggest to provide a better description. You will notice that this is a new custom report layout because the “Built-in” check box is unchecked. You also have an opportunity to assign this per company so this is helpful if your default may be different per company, for example, logo or specific verbiage that is unique to an entity.

Business Central: Custom Report Layouts

Business Central: Custom Report Layout
Now that we have a copy of the custom report layout, let’s actually customize it by clicking Layout > Export.

Business Central: Custom Report Layout
Once I have exported the layout, I can open the document and make my changes. Keep in mind that my changes is only at the layer, the look and feel. If you need to add new fields to the layout, you will need to enable the Developer tab in Word which will be a different topic/blog another day.
So let’s review my changes. I wanted to highlight the Due Date, add footer verbiage, also highlighted, and a logo of some sort. Once I am done with the changes, save the document, head back to Business Central Custom Report Layout that you just created, click Layout > Import Layout by dragging or navigating to the location of the custom report layout file.

Business Central: Custom Report Layout
Business Central: Custom Report Layout
Once you have imported the new custom report layout for your email body, make sure you Run Report to validate your changes are being seen and voila! It printed without issue!

Business Central: Email Confirmation
Now we have confirmed that the changes are working, let’s make sure that Business Central will use this newly created custom report layout for Sales Order Confirmation Email body.
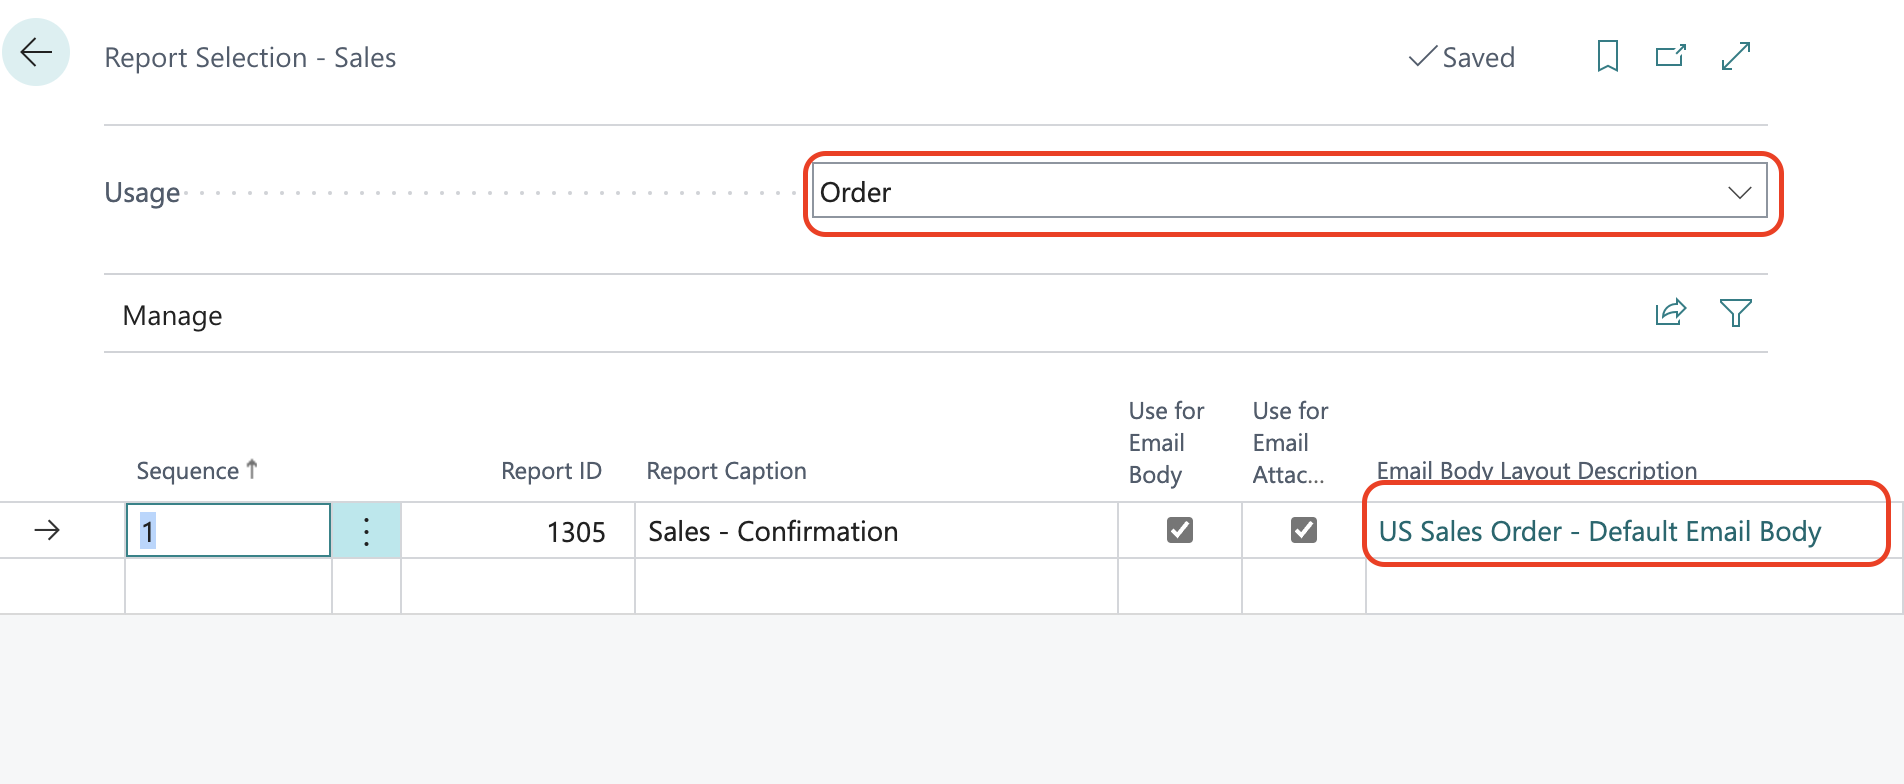
To apply this custom report layout, navigate to Report Selection - Sales. Usage should be “Order” and click within the Email Body Description to choose the new custom report layout.
Business Central - Report Selection - Sales
When you clicked on “US Sales Order - Default Email Body”, you will receive a pop up page to select your new custom report layout and click OK.

Business Central: Custom Report Layouts
Let’s now confirm that this is working and it is using your new Sales Order - Email Body. I will navigate back to a Sales Order and Email Confirmation. And there it is! It is now using the default email body.

Business Central: Default Email Body